Knowing how to protect tree roots during home construction comes down to one rule: fence off the tree’s critical root zone before any equipment arrives, and keep it clear of traffic, digging, spoil and chemicals until the build is finished. Almost all tree deaths blamed on later drought or disease were actually caused by a few weeks of compacted soil during a build.
Most of the fine, water-absorbing roots of a mature tree sit in the top 12 to 18 inches of soil, where they need oxygen. Drive a compact track loader over that layer and the pore space collapses, cutting the tree off from water and air without killing anything you can see. The tree often looks healthy for two to five years, then declines suddenly, and by then the damage is usually past the point of repair.
The good news is that protection is mostly cheap, physical and easy to enforce. Here is the process I would follow on any site where a build comes near a tree worth keeping.
Table of Contents
- What You Need
- Step-by-Step: Protecting Roots From the First Day of the Build
- 1. Map the trees and mark the critical root zone
- 2. Bring in an arborist or your local authority early
- 3. Install protection before equipment arrives
- 4. Keep excavation and utilities outside the critical root zone
- 5. Control soil, water and construction traffic
- 6. Inspect roots and soil throughout the project
- 7. Repair and restore the tree after construction
- Common mistakes and how to correct each one
- When a Professional Is Required
- Frequently Asked Questions
- How far from a tree can I build or pour a foundation?
- Do tree root barriers work?
- Can heavy equipment drive over tree roots during construction?
- What happens if tree roots are already cut during a build?
- Do I need a tree protection plan for a building permit?
- How do I know if the tree survived the construction damage?
- Final Construction-Day Checklist
What You Need
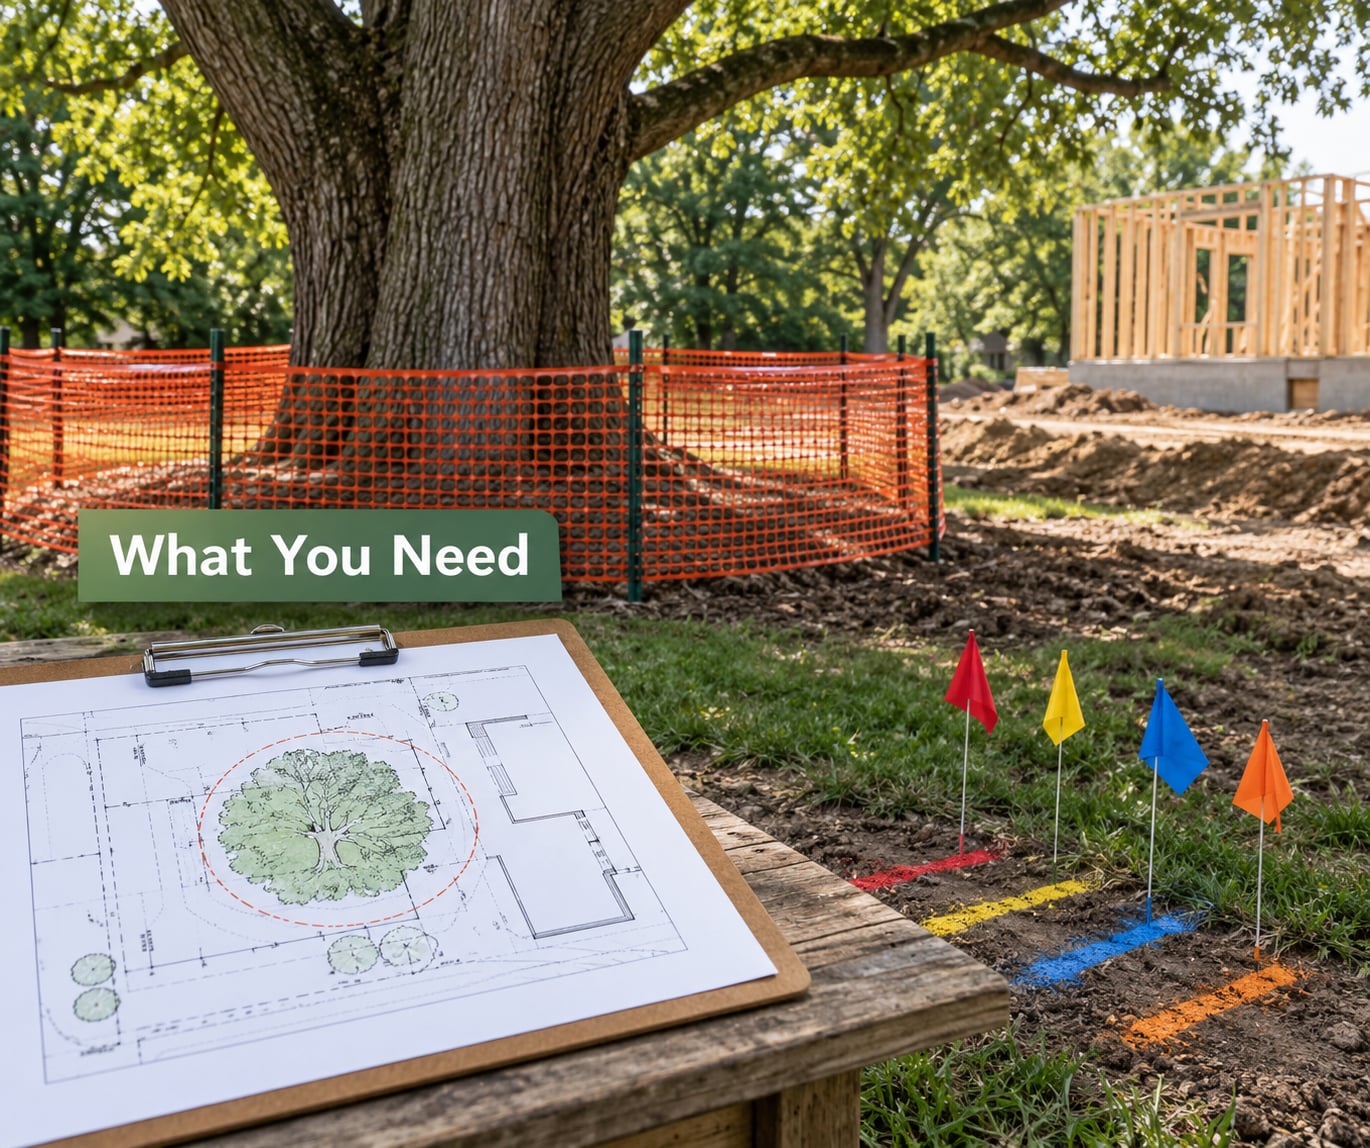
Most of this list is paperwork and barriers, not machinery. Gather it before the first contractor arrives, not after.
- A site plan showing every tree, its trunk, canopy spread and any existing damage, with the proposed building, driveway, utilities and access routes drawn on the same sheet.
- An arborist report from a qualified or certified arborist, if any tree is large, valuable, protected, near the footprint or showing signs of stress.
- Rigid tree protection fencing, either orange construction fencing or plastic snow fencing, plus steel T-posts, zip ties and a mallet or post driver.
- A designated concrete and mortar washout area, sited well outside the root zone, with drip trays for paint, fuel and solvent containers.
- Timber or plywood mats sized so equipment can cross on top of them rather than onto the soil.
- Wood chip mulch and a watering plan for the recovery period after the build.
Step-by-Step: Protecting Roots From the First Day of the Build
1. Map the trees and mark the critical root zone
Start by listing every tree that could conceivably be touched by the work, including ones well back from the footprint. A tree that loses a third of its roots rarely looks affected in the same season, so the decision to protect it has to be made before anything moves.
The critical root zone is generally the ground under the canopy and out to the dripline, the outer edge where rain stops dripping from the leaves. That is a starting point, not a limit. Extension guidance from Colorado State University gives a reproducible rule: measure the trunk diameter at 4.5 feet above the ground, then multiply that number of inches by 1.5 feet to get a minimum protection radius.
So a tree with an 8 inch trunk diameter gets a 12 foot radius, which covers roughly 452 square feet. Other sources use multiples of trunk diameter instead, with 12 times and 15 times both appearing in the urban forestry literature. When the numbers disagree, use the larger radius and treat the arithmetic as a floor rather than a target.
You are looking for a completed map when the outline of the protected area is staked on the ground before grading starts, not sketched on a plan that never reaches the site.
2. Bring in an arborist or your local authority early
Get professional input when a tree is large, protected by a local bylaw, already declining, leaning, or close enough that the design could reasonably change. A tree in poor health or poor structural condition is sometimes a removal candidate, and an arborist is the person who can tell you that early enough to change the design rather than argue about it after the footings are poured.
Send the arborist your plan drawings, the species, the trunk diameter and photos of the canopy and any dead branches. What you want back is a written tree report and protection recommendations you can attach to the construction documents, so the requirements survive a change of crew. The extension version of this work is organised as a formal tree report, and having one in hand is also what most permit offices want to see.
Local rules matter too. Some municipalities require a tree protection plan at permit stage, and several cities in Britain and Ireland define a root protection area on a similar basis. Check the planning authority for the address before the design is finalised, not after.
3. Install protection before equipment arrives
This is the step that decides everything, and the one that is most often skipped. Fencing installed after the excavator has crossed the root zone is the tree equivalent of putting on the seatbelt after the crash.
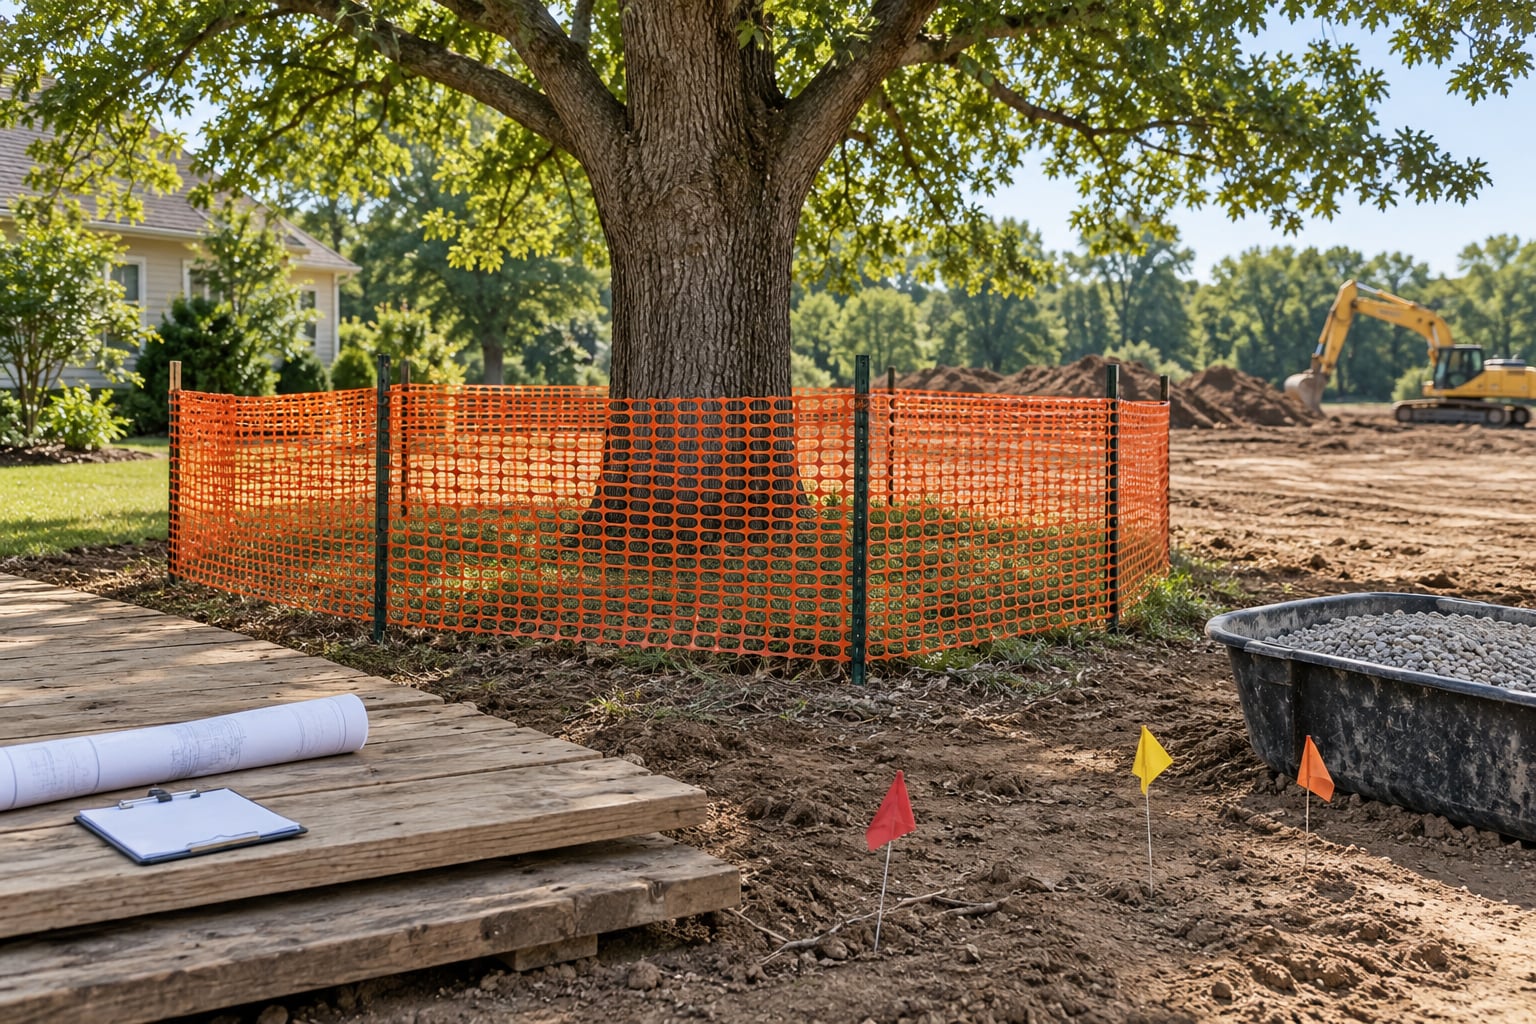
Drive posts at the calculated radius, stand the fencing at the correct height, and zip-tie it so it cannot be pushed over or walked through without effort. Post spacing close enough that the fence stays taut matters more than the colour of the material. If you have to choose between orange construction fencing and snow fencing, snow fencing is far harder to drive through by accident.
Everything else follows from the fence line. Park no vehicles, stack no timber or pallets, store no spoil or rubble, and set no concrete washout inside it. Where access across the zone is genuinely unavoidable, lay timber or plywood mats down first and keep equipment on them for the whole job rather than the first day.
4. Keep excavation and utilities outside the critical root zone
Trenching straight through a root zone is the fastest way to kill a mature tree, because it severs the major structural roots that hold the tree up and feed the canopy. If a utility line or footing genuinely has to go near the tree, there are far better options: hand digging, vacuum excavation with an air spade, directional drilling, or screw and helical piles driven from outside the protected area.
Watch the grade as carefully as the trench. Adding fill over roots suffocates them, and cutting grade away dries the soil and cuts the roots off from rainfall. Most tree protection standards treat significant fill and cut inside the protected zone as a reason to redesign rather than a detail to work around.
5. Control soil, water and construction traffic
Compaction is the quietest killer on the list, and it comes from more than the excavator. Repeated foot traffic, a stacked pallet of block, a spoil heap left for a fortnight and a parked delivery van all do the same thing to pore space.
Keep spoil out of the zone entirely, cover any soil that cannot be moved, and check the fence line daily for the first two weeks, which is when crews are busiest and least careful. Contain every chemical on site: a washout station away from the tree, drip trays under fuel and solvent containers, and no refuelling inside the fence.
Water is the other half of it. Construction often strips the shade and moisture a tree relied on for years, so during a hot dry spell, irrigate slowly and deeply rather than sprinkling. Soil that swings between dust and saturated week to week stresses a tree far more than a steady, moderate supply.
6. Inspect roots and soil throughout the project
Walk the fence line and the ground inside it weekly. You are looking for exposed roots at a trench edge, a leaning or bowed fence section, standing water, soil pushed up against the trunk, fresh mud tracked through the zone, or a vehicle inside that should not be there.
Every one of those has a specific response. Cover exposed roots with boards and clean soil immediately, backfill the same day. Re-shoot a bowed fence and re-tie it. Clear standing water and restore drainage. Photograph any unauthorised entry the same day, with the date, before the evidence dries out.
Weekly inspection is only useful if the crew knows it is happening. Put the walk-through in the site diary and attach it to the contract, so a blocked fence is a documented problem rather than a surprise.
7. Repair and restore the tree after construction
When the build ends, take the mats and fencing up carefully, by hand, without dragging anything across the soil. If the soil underneath was compacted anyway, break it up with an air spade or a manual vertical mulch tool rather than a rototiller, which just compacts it again at a deeper level.
Restore a mulch layer over the root zone, keep it off the trunk flare, and water deeply through any dry stretch. Where significant roots were cut or soil was compacted, an arborist can prescribe deep root fertilisation or soil injection, which works far better as a planned follow-up than as a panic measure.
Then watch the tree for two to five years, because that is how long the damage takes to show. Canopy dieback, leaves that come out small and pale, epicormic shoots sprouting on branches or trunk, and a heavy seed set are the warning signs. Pruning out the sprouts is cosmetic; the tree is telling you the root system is no longer keeping up.
Common mistakes and how to correct each one
- Fencing too close to the trunk. A fence at the drip line is inside the protected area, so it protects almost nothing. Re-shoot the radius from trunk diameter and move the fence out.
- Digging through roots because the schedule is tight. Stop the trench. Switch to hand digging, air spade vacuum excavation or directional drilling, and price the alternative before the machine is in the ground.
- Stockpiling materials under the biggest tree. It is the shade everyone wants, which is exactly why it fails. Ban storage inside the fence in writing and give the crew a marked staging area outside it.
- Concrete washout on the lawn. A truck driver pouring a barrel out is a decision made in two minutes. Provide one washout station and put its location on the site plan.
- Changing the grade under the canopy. Fill and cut both harm roots. Design the finished level so that the tree sits in roughly the same soil relationship it has now.
- Installing the fence after the damage. No amount of remedial treatment matches prevention. If equipment is already on site, stop work, lay mats, and have an arborist assess what has happened so far.
When a Professional Is Required
Ordinary homeowner precautions cover small jobs: a short driveway, a shed base, a fence line that stays well clear of the dripline. For anything with a footprint, a trench, a significant grade change or a mature tree nearby, you want people whose job is that specific problem.
An arborist should review the design when a tree is protected by a bylaw, is large or valuable, is already declining, is close to the boundary, or would lose a significant share of its root zone. They can also tell you when the honest answer is that the tree will not survive the work and should be removed on purpose, with the loss on your terms, rather than dying slowly beside a new patio.
A utility locator is not optional before any excavation, and in most places it is free and required. A structural engineer belongs in the conversation where foundation design conflicts with root protection, since a designer may be able to move a footing, change its depth or use screw piles instead. And a planning authority needs checking whenever a tree is protected, because the permit stage is where that requirement usually appears.
As a rough triage, arborists commonly work from the idea that a tree tolerates the loss of about a quarter of its root system, enters serious decline past 40 percent, and is usually a removal candidate above half. If the proposed work is heading toward those numbers, the design is the problem, not the tree.
Frequently Asked Questions
How far from a tree can I build or pour a foundation?
Keep the foundation, its excavation and any fill outside the critical root zone, calculated at roughly 1.5 feet of radius per inch of trunk diameter measured at 4.5 feet. Where a foundation must come closer, use screw piles or drilling from outside the protected area, and have an arborist review the design before permits are issued.
Do tree root barriers work?
It depends which product you mean. A tree protection fence keeps people and equipment out and helps the tree. A root control barrier is designed to stop roots growing into a structure, and it often severs roots on installation, which can destabilise or kill a nearby tree. Treat the two as completely separate items.
Can heavy equipment drive over tree roots during construction?
Occasionally, yes, on timber or plywood mats laid down before the first pass, with equipment kept on them for the whole job. Repeated passes directly on soil compact the top 12 to 18 inches of root zone and do lasting damage even when no root is visibly cut. If you cannot lay mats, keep the equipment out.
What happens if tree roots are already cut during a build?
Severed roots do not grow back from the cut end, and the tree loses both water uptake and stability. Cut surfaces should be cleaned and the surrounding soil kept moist, and an arborist can prescribe soil injection or deep root fertilisation. Expect no visible reaction for two to five years, when canopy dieback or epicormic sprouting finally appears.
Do I need a tree protection plan for a building permit?
In many places you do. Cities and counties commonly require a tree protection plan at permit stage for construction near a protected, significant or mature tree, and failure to produce one can hold up approval. Ask the planning authority for the address early, and expect the plan to specify fencing, staging and the arborist’s requirements.
How do I know if the tree survived the construction damage?
Judge it over several seasons, not weeks. Signs of trouble include canopy dieback at the tips, leaves that are noticeably smaller or paler than last year, shoots sprouting from the trunk or branches, a heavy seed set, and branch drop in the crown. Any two of those together mean get an arborist out before the next growth cycle.
Final Construction-Day Checklist
If you remember nothing else, do these five things before the first machine turns up, in this order:
- Identify every tree the work could reach, and measure trunk diameter at 4.5 feet so you can calculate a real protection radius rather than guess at the dripline.
- Get the arborist report and any bylaw requirement from the planning authority, and put the protection requirements into the written contract.
- Install rigid fencing at the calculated radius and tie off the designated staging area, parking and washout locations well outside it.
- Confirm utility positions with a locator and plan the trench, foundation and access routes against the fence line on the site plan.
- Photograph and document the root area, then walk the fence line weekly and keep the record.
None of that is difficult or expensive. What fails is almost always the same thing: protection decided on in theory, and installed late.