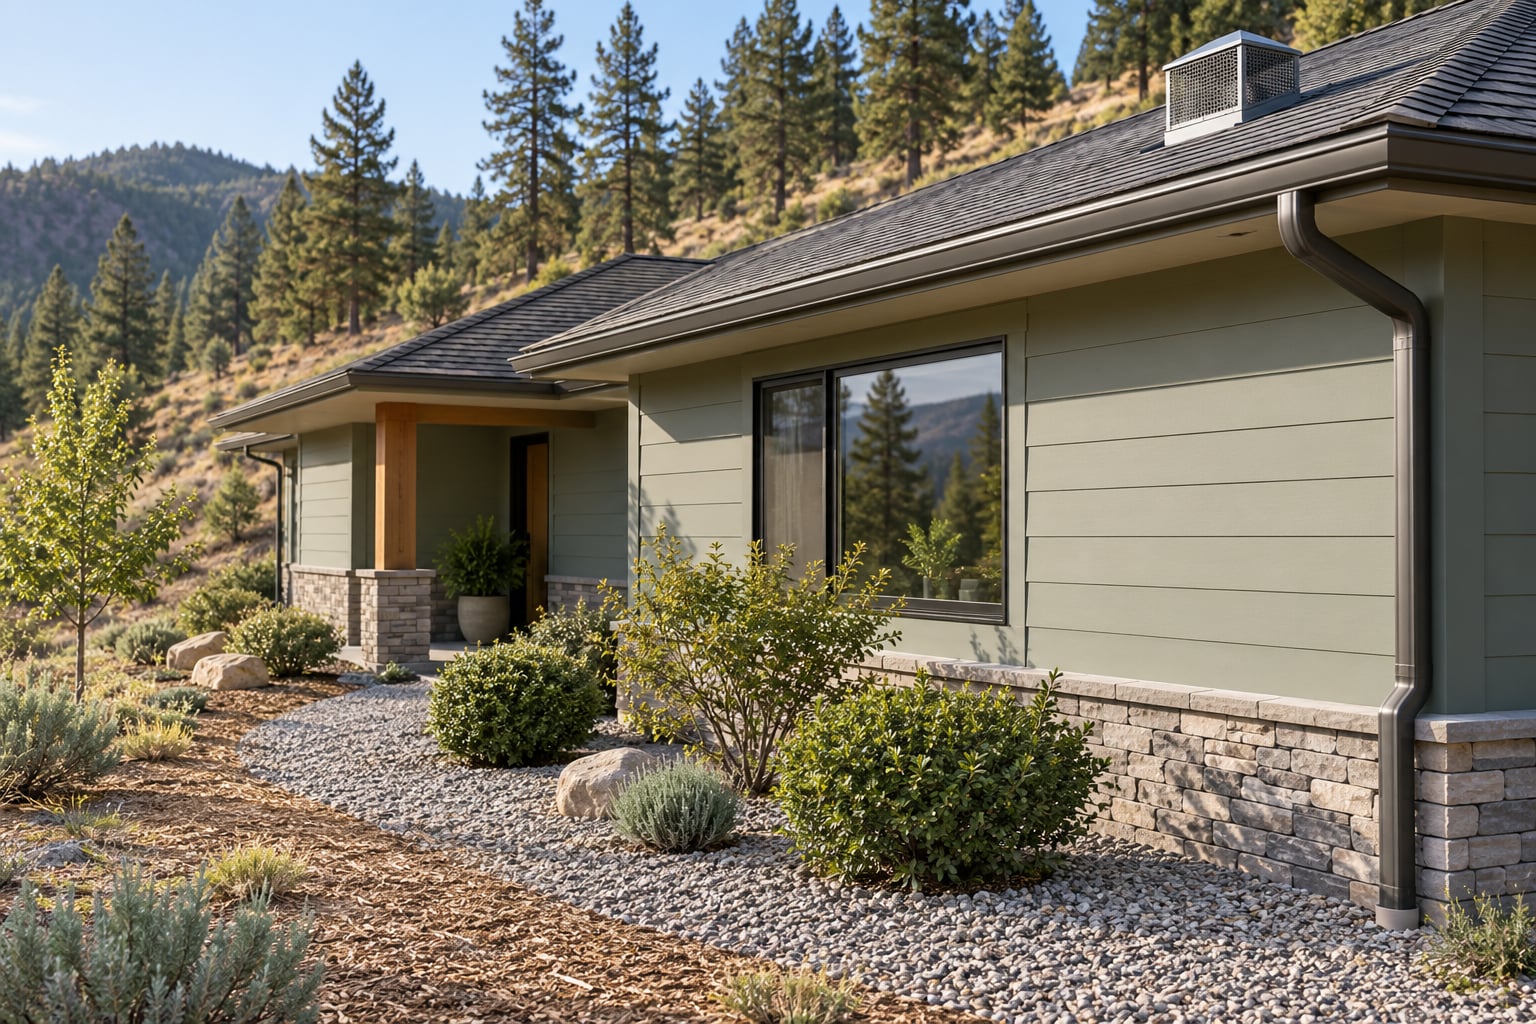
Hardening your home against embers means closing the routes a wind-borne ember uses to reach the inside: mesh every vent, seal or screen gaps in the building envelope, clear combustibles from the ground nearest the walls, and keep roofs, gutters and eaves maintained. Most wildfire home losses start inside the envelope rather than at the flame front, so the components that decide survival are the ones people ignore. Most of this is weekend work with hand tools; the rest belongs to licensed trades.
It is worth saying plainly what this guide is not. Nothing makes a house fireproof, and hardening never replaces leaving early. What it does is buy you time and reduce the chance that the first ember to land does the damage. Longer, hotter fire seasons have pushed this work from a nice-to-have into the ordinary maintenance list for anyone living at the edge of a wooded or scrub area, and in southern Spain the same physics apply as in California, Australia or Portugal.
Table of Contents
- What You Need to Harden Your Home Against Embers
- Step-by-Step
- 1. Assess the Main Ember Entry Points
- 2. Create a Defensible Zone in the First 0-3 Metres
- 3. Protect the Roof, Eaves and Vents
- 4. Seal Gaps and Upgrade Openings
- 5. Use a Zone Strategy to Harden Your Home Against Embers
- 6. Protect Utilities and Plan Safe Access
- 7. Document, Maintain and Practise Your Plan
- Common Mistakes
- Frequently Asked Questions
- What is the best first step when hardening a home against embers?
- Does an air conditioner need ember protection?
- Are metal vent screens enough to protect a home from embers?
- How can I create a defensible zone without harming wildlife?
- When should I evacuate if wildfire embers are reaching my neighborhood?
- Conclusion
What You Need to Harden Your Home Against Embers
Before you buy anything, get your local fire authority guidance. Requirements differ by region, by the hazard zone your address sits in, and by the age and construction of the building, so the published checklist for your area outranks anything general you read here, including this page. Regional wildfire services publish risk levels and seasonal preparation advice, and in Spain that means your municipal authority and the Junta de Andalucía wildfire service, with 112 as the emergency number.
Then gather the practical kit. For the assessment and clearance work you need a sturdy ladder, gloves, eye protection, a dust mask, pruners, a rake, and a pressure washer or stiff broom for hard surfaces. For screening and sealing you want stainless steel, galvanized or bronze mesh of 1/8 inch or finer, corrosion-resistant fasteners, the matching trim or frame, and a compatible sealant or intumescent strip for the edges.
A few more items make the job easier. A tape measure for vent and opening dimensions, a phone camera for before-and-after records, and a written log or spreadsheet for dates and receipts. Tall ladders, roof access, anything involving wiring, gas lines, glazing replacement or structural framing is not a DIY job. If the assessment turns up rotten eaves, a failed roof, or a service entrance that needs moving, stop and get a qualified contractor.
Step-by-Step
Work through these in order. Each step describes what to do, how to check that it worked, and when to bring in someone qualified. The ordering is deliberate: it goes from identifying the entry points, outward from the building, and finishes with the plan you hope never uses.
1. Assess the Main Ember Entry Points
Start with a slow walk around the house at dusk or in flat light, looking up as much as looking across. The points that matter are the roofline and eaves, the gutters and downspouts, every vent you can find, windows and doors including their frames and slides, the gaps where pipes and cables enter, and anything combustible sitting against or near the structure: decks, fences, wood piles, a shed, stored lumber, dense shrubs pressed against a wall.
Photograph everything and write it down. A list of gaps with photos is the single most useful thing you will produce, because it orders the work and it doubles later as insurance documentation. Prioritise exposed gaps and combustible construction first. Cosmetic improvements can wait until the vent screens and the roof edge are dealt with.
How to check it worked: you now have a documented list, and you know which items sit in the first three metres, which sit on the building, and which are on the roof. When qualified help is needed: any inspection requiring you to walk a roof, climb above a safe ladder height, or open up a wall or soffit.
2. Create a Defensible Zone in the First 0-3 Metres
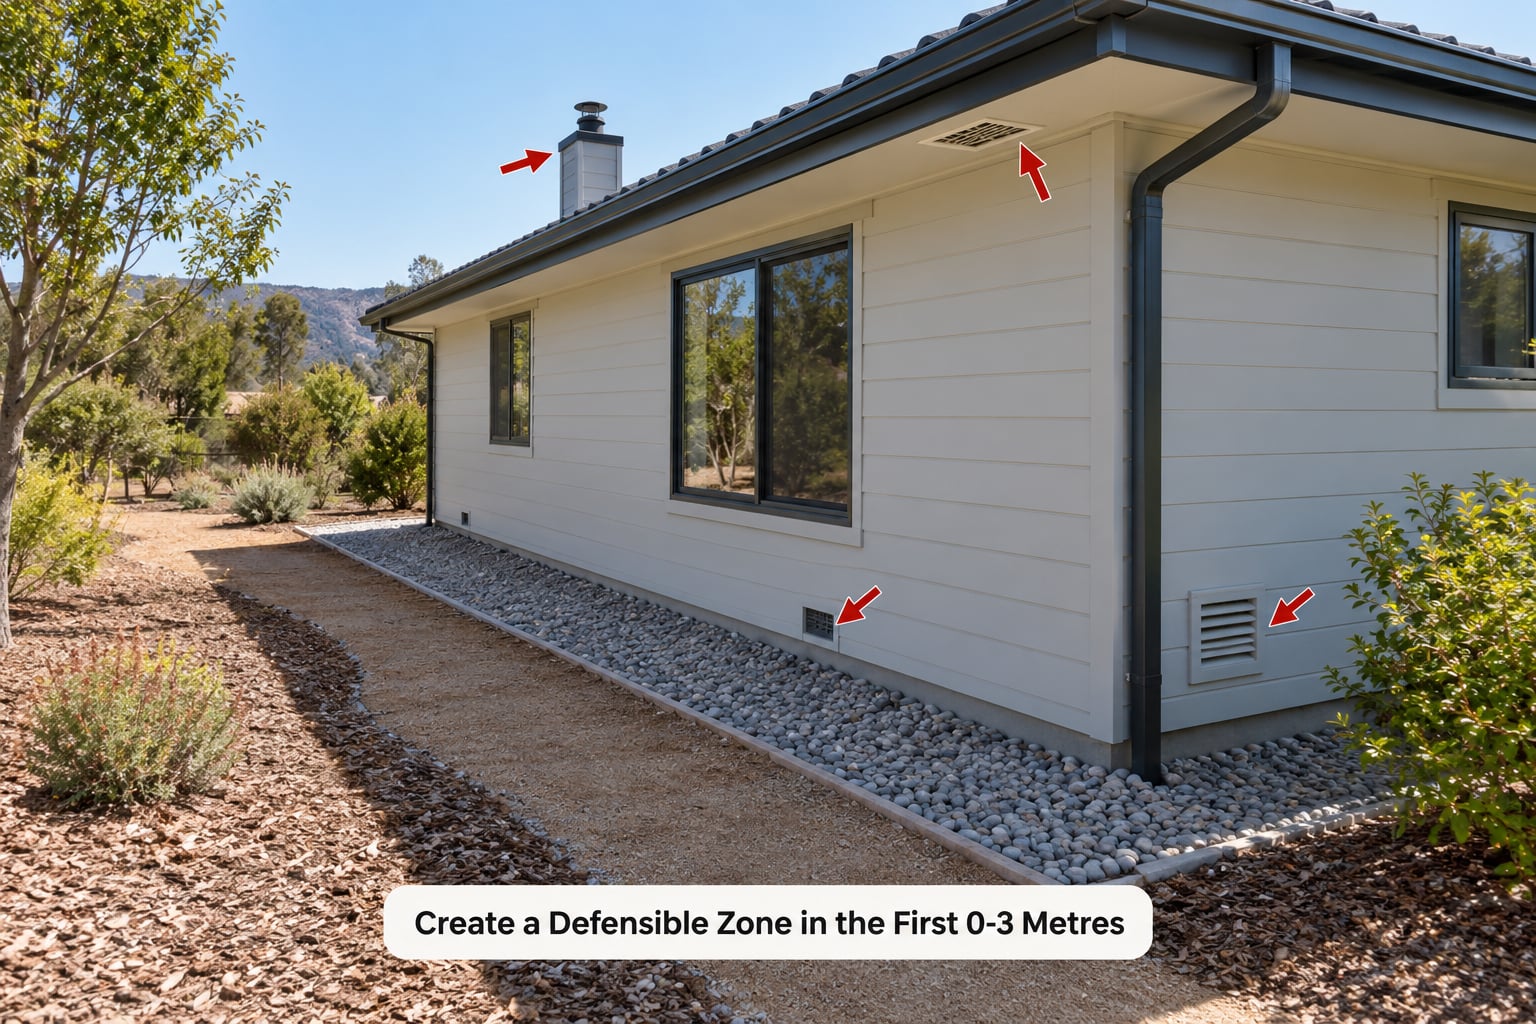
The first three metres around the walls matter more than the twenty metres beyond them, which surprises people used to thinking of defensible space as a wide clearing. In that narrow band, remove combustible material outright: leaf litter, dry grass, stored boxes, cardboard, plastic, wood piles, moveable furniture, dead branches. Anything you keep there should be non-combustible, such as gravel, stone or bare mineral mulch, and it needs to stay clear through the season rather than being tidied once.
Keep the space immediately beneath and beside openings open. A window with a hedge pressed against it is a window with a path into the house, and pruning a shrub back five feet does more for ignition risk than any coating you can paint on the wall. Watch out for the common trap of clearing the ground but leaving the vertical fuel: fence boards touching the siding, a trellis fixed to the house, a climber on a fence line, an eave lined with stored wood.
Two cautions. First, do not conflict with local ecological or fire rules, protected species, or the water restrictions that govern what you plant in a drought zone; non-combustible ground cover solves most of that tension anyway. Second, work with the slope and wind direction rather than a tidy rectangle, and clear uphill and upwind ground before downhill. How to check it worked: stand at each window and each vent and confirm you can see ground, and that nothing combustible sits inside the band.
3. Protect the Roof, Eaves and Vents
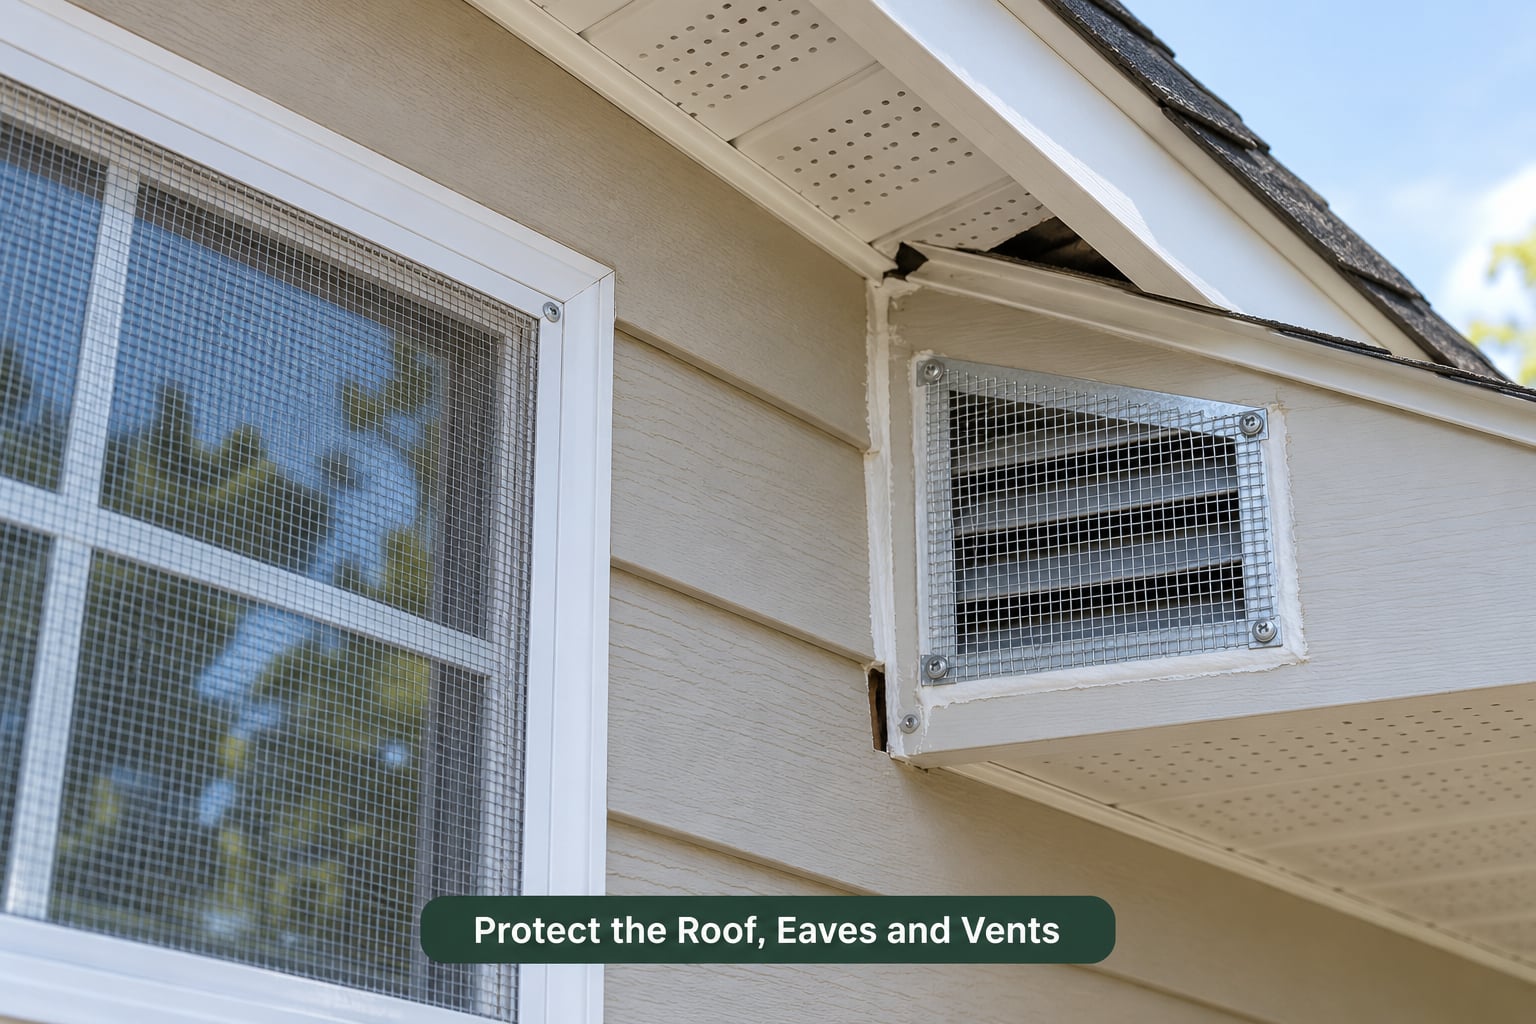
Vents are the most commonly missed entry point on the whole structure, and homeowners consistently name them as the one upgrade they would repeat first. An unscreened attic, gable, soffit, ridge, dormer or crawlspace vent is a ready-made channel straight to the interior. Go through the property methodically and count them, because vents hide under eaves and behind lattice work.
The standard retrofit is metal mesh over the opening: 1/8 inch is the common baseline requirement in current wildfire-prone building codes, and 1/16 inch is the better-practice figure that filtering improves as mesh gets finer. Mesh has to be metal. Aluminium, galvanised steel, stainless steel and bronze are the workable options; plastic, fibreglass and insect screens melt or deform well below the temperatures reached inside an ignited attic, so they give you nothing. Mount the mesh to the outside of the vent frame, not inside, so it does not sag when it heats, and use corrosion-resistant fasteners so it survives a few seasons of weather.
The trade-off is airflow. Finer mesh restricts it more, and the moisture question comes up constantly in homeowner forums, so monitor your attic or crawlspace after a change rather than assuming. If a room feels damp, check ventilation and moisture sources before you blame the mesh. A common compromise is fine mesh on the vulnerable openings and a properly sized exhaust or soffit vent elsewhere, so you protect the attic without starving it of air.
Intumescent vent covers are the other option. They contain a material that expands and seals the opening when it heats, and they pair well with mesh for the highest-risk openings. They cost more per vent and are less forgiving to fit badly, so follow the manufacturer instructions and confirm airflow requirements before specifying them. On the roof itself, look for a Class A rated covering such as tile, metal or a rated shake, repair any lifted or missing pieces, keep the roof-to-wall and roof-to-eave intersection clean and sealed, and put a spark arrestor on the chimney and any stovepipe. Clean the gutters and valleys of debris and check that downspouts and drains are not blocked.
How to check it worked: every opening you counted has mesh or a cover, no screen is torn or sagging away from its frame, water still drains as it should, and the attic still ventilates. Call a roofer or a chimney professional for anything on the roof, and never use leaf guards as a substitute for cleaning debris.
4. Seal Gaps and Upgrade Openings
Openings are where ember resistance and fire resistance are often confused. Non-combustible assembly means the materials used do not contribute to the fire, such as metal frames, metal flashing and composite trim. Fire-rated assembly means an assembly tested to perform in a fire, which is a different and higher bar. For most homeowner retrofits, correctly installed non-combustible materials and tightly closed gaps deliver most of the practical benefit at a fraction of the cost of a listed fire-rated assembly.
Doors and windows need their frames, thresholds, slides and sweeps checked for daylight. Single-pane glass and large unprotected panes are the weak point, because an ember small enough to hide in a palm is still enough to break thin glass and reach the curtain or the upholstered chair behind it. Tempered or safety glass, glazing designed to resist ember entry, and shutters or screens that close fully are the upgrades to consider for the largest panes. Put metal or non-combustible cladding on any timber trim around openings, because cladding that touches the wall is exactly where fire stops and inspections look first.
Then chase the service penetrations: the pipe, cable and conduit entries through walls and the roof, the dryer and bathroom exhausts, the range hood, and any opening around the chimney. Fill gaps with a material rated for the temperature and movement at that joint, and keep the finished joint tight enough that air does not whistle through it in wind.
How to check it worked: no daylight at doors or windows when the lights are off inside, no visible gaps around penetrations, and no combustible material within a hand’s width of any opening. Bring in a licensed installer for glazing replacement, structural or framing changes, anything electrical, and any entry that must move to meet a local requirement. Also avoid sealing a home so tightly that heat and smoke have nowhere to go; ventilation must still work as designed.
5. Use a Zone Strategy to Harden Your Home Against Embers
A zone strategy is simply the habit of deciding what to do next by asking which zone the work belongs to, working from the building outward. Three zones matter: the assembly itself, the openings, and the ground around the building. Then defensible space extends the work to the wider property and the neighbouring ground, and only after that does active defence during an event, such as shutting down utilities, come into play.
That ordering matters because it is inverse to how most people spend money. Cosmetic work on the walls feels finished and visible; screening a vent under an eave does not. Yet the assembly and the openings are where embers actually get in, the first three metres of ground are where radiant and convective heat begin working, and the wider defensible space is what gives you time. Treat them as one connected system rather than a shopping list of separate products, and revisit the order every season, because wind direction and the surrounding property change.
If your budget only allows a slice, take it in this order: a defensible first three metres, vent screening across the whole property, roof and gutter condition, then openings and trim, then anything beyond the immediate perimeter. This is the same order homeowners in fire-prone regions give when they recommend a first weekend project, and it lines up with the way insurers and fire investigators describe the sequence of losses.
6. Protect Utilities and Plan Safe Access
Utilities fail in ways that are hard to undo. Clean or screen HVAC intakes and make sure you know how to shut the system down, because an air conditioner or heat pump running during a fire can pull smoke and burning particles through the ducting and into the house. Learn the shutdown control for your system, and follow the manufacturer instructions rather than guessing. Do the same for the electrical supply and any gas service, and check whether your outdoor lighting, meter housings and generator connections sit in a spot where a fire or debris field could reach them.
Storage matters more than people expect. Keep fuel containers, propane, paint, solvents, and any compressed or flammable containers away from the structure and well clear of the first three metres. Keep generators outside, on a stable surface, with the clearances the manual specifies, and never run one inside a garage or near an opening. Keep generators and power tools ready but stored so a panic grab does not take extra time.
Access is a preparation task too. Keep the route out usable: two ways out where the site allows, gate latches that open without a key, and a driveway or path that stays clear of vehicles, trailers and stored items. Tell every adult in the household which exit is which, and check that the same is true for neighbours who might help. In Spain, sign up for the regional emergency alert service and make sure the household has the local emergency number saved rather than searched for under pressure.
7. Document, Maintain and Practise Your Plan
Photograph the finished work from the same angles after every project, save receipts and product documentation, and note the date of each inspection. That file is what an insurer asks for when a claim is filed after a fire, and it also protects you at resale, since hardening has become a buyer expectation in exposed areas rather than purely an owner project. Keep it in the cloud as well as on a drive, so it survives an evacuation.
Put the recurring checks on a calendar: gutters and valleys in spring, mesh and vent covers checked after every storm, the first three metres before the season starts, and the full walkthrough each year. A hardening project is not finished work, it is a habit, and the five minutes it takes to spot a torn screen or a heap of dry brush that blew back in is the difference between hardening and a photo of hardening.
Then rehearse the departure. Everyone who leaves the house should know the trigger, the route, and the meeting point. Plan for pets, mobility needs, children, and anyone who needs help to move, and build in the time that takes rather than the time you wish it took. When officials issue an evacuation order, or when conditions make leaving unsafe, you leave. No amount of preparation justifies delaying departure to save possessions, and no possession is worth turning a survivable evacuation into a fatality.
Common Mistakes
Starting with a big garden project instead of the nearest ignition paths. A beautiful, wide, low-fuel yard is pointless if there is an unscreened vent 30 centimetres from a wall. Correct the first three metres and the openings first; widen the clearance afterwards. Safety note: clearing uphill and upwind first pays off more than clearing the prettiest side.
Treating fire-resistant as fireproof. No material, coating or system makes a house safe in a flame front, and the word is banned in most building standards for a reason. Correct the framing: you are reducing ignition probability, not surviving an extreme fire. Safety note: anyone selling you certainty that a product makes a home fireproof is selling something.
Sealing in a way that traps heat and smoke. Gaps get filled, but so do the ventilation paths a house depends on, including attic and crawlspace ventilation and the make-up air a gas appliance needs. Correct the work: pair screening with verified airflow, and have combustion-related changes checked. Safety note: a backdraft or spillage incident is a carbon monoxide risk, not just a comfort problem.
Over-relying on one component. Perfectly screened vents on a home with combustible trim against the eaves is a partial fix, not a hardened home. Treat the assembly, the openings, the ground and the wider space as one system and prioritise the weakest zone each season. Safety note: the weakest assembly usually shows up first in a post-fire inspection.
Leaving maintenance for the week the fire arrives. Blocked gutters, an overflowing downspout and a branch resting on the roof are all ember landing sites and all fuel. Schedule them for the quiet part of the year. Safety note: if roof or gutter work needs a ladder in wind or heat, hire it out.
Relying on a late evacuation. A plan that starts when smoke is visible is already behind. Set the trigger in advance, prepare go-bags, and leave when officials say to leave. Safety note: a well-ventilated home keeps far less smoke than a sealed one, so close windows, doors and vents only at the moment of departure.
Frequently Asked Questions
What is the best first step when hardening a home against embers?
Walk the property and find every vent, opening and combustible item within the first three metres of the walls, and write the list down with photos. That survey takes an hour and it orders everything after it. The usual first weekend project that follows is screening all the vents with 1/8 inch or finer metal mesh, because unscreened vents are the entry point most often missed. Clear the ground at the wall line in the same session.
Does an air conditioner need ember protection?
The outdoor unit itself usually needs clearing vegetation and debris away from it, and the real issue is the intake. A running system can draw smoke and burning particles into the ducting and through the house, so know where the shutdown control is and follow the manufacturer instructions for isolating it. Keep vegetation clear of the unit, keep the roof and gutters above it clean, and never run a generator near an opening.
Are metal vent screens enough to protect a home from embers?
They are the highest-return single measure most homeowners take, but they are one part of a system. Screens do nothing for the roof edge, the eaves, the gaps around doors and windows, or the combustible material pressed against the wall. Use 1/8 inch or finer metal mounted outside the vent frame, check it after storms, and pair it with a clear first three metres and maintained roofs and gutters.
How can I create a defensible zone without harming wildlife?
Work in zones instead of clearing everything. Remove combustible material outright in the first three metres, then thin or prune rather than strip beyond it, choosing species that stay low and keep the ground bare. Leave connected cover for small animals, retain mature trees where they are not a hazard to the structure, avoid nesting season, and check whether any species or area near you is protected before you cut. Non-combustible ground cover such as gravel solves the gap without removing habitat.
When should I evacuate if wildfire embers are reaching my neighborhood?
Leave when officials issue an order, and leave early enough to travel at normal speed rather than in evacuation traffic. If embers are already falling near you, conditions are degrading and you should not be gathering belongings. Close windows, doors and vents as you leave, do not run the HVAC system, and do not return until fire officials say it is safe. Personal safety comes before the property, every time.
Conclusion
Hardening your home against embers is a short list in a fixed order, not an open-ended spending spree. Get your local fire authority guidance first, since their requirements outrank anything general. Then survey the property, clear the first three metres around the walls, screen every vent with metal mesh, and put the roof, eaves and openings next. After that, keep it documented and maintained, and leave early when officials tell you to go.