You can tell if your roof is good for solar panels in about ten minutes without anyone climbing it: look for near-unobstructed sun for most of the day, roughly 300-400 square feet of clear usable roof space, and at least 15-20 years of roof life left. If all three are true, your roof is a strong candidate. This checklist walks through how to check each one from the ground.
The point of a preliminary check is not to replace an installer’s site survey. It is to know, before anyone knocks on your door, whether your roof clears the obvious thresholds — and which questions are worth asking when a salesperson starts talking numbers.
Table of Contents
- Key Factors for Solar Readiness
- What You Need
- Step-by-Step
- Check the Roof’s Direction and Sun Exposure
- Look for Shading Throughout the Day
- Inspect the Roof Surface
- Estimate Usable Roof Space
- Have the Structure and Electrical System Checked
- Common Mistakes
- Frequently Asked Questions
- What type of roof is not good for solar panels?
- Is a 20 degree roof pitch ok for solar panels?
- What are the 20%, 25% and 33% rules for solar panels?
- Can solar panels be installed on a clay tile roof?
- Do solar panels damage your roof?
- How many solar panels can I fit on my roof?
- Conclusion
Key Factors for Solar Readiness
- Sun exposure: direct sunlight across most of the day, with no large shadow crossing the panels around midday.
- Usable space: 300-400 sq ft (28-37 m²) of roof plane after setbacks, walkways and vents are removed.
- Remaining roof life: 15-20 years minimum, since panels are bolted through the covering and stay up 25-30 years.
- Direction: south first in the northern hemisphere, then southeast or southwest, then east or west. North-facing is weakest.
- Pitch: somewhere between 20 and 45 degrees. Flatter roofs work but need tilt racking.
- Material: asphalt, metal, concrete and rubber are all workable. Wood shake and fragile clay tile are not.
- Structure: a deck and rafter layout that can carry the added dead load — something only a professional can sign off.
Everything below stays at ground level. Nothing in this guide asks you to climb onto a roof, lift a tile or open an electrical panel.
What You Need
You need very little, which is the point. The whole check is observation plus a phone.
- Your roof’s paperwork, if you have it: the original invoice, warranty paperwork or a survey from when the house was sold. It usually lists the covering material and the install year, which saves you guessing.
- A phone with a compass app and satellite imagery. Google Earth or any similar viewer lets you look straight down at your own roof, which is far more accurate than trying to remember the layout from the street.
- A tape measure and a notepad, for the rough usable-area estimate in step four.
- Binoculars, if you want to check ridge lines, flashing and the general condition of the covering without climbing.
- A clear afternoon, ideally one where you can look at the roof more than once. Shade patterns change fast.
No ladders, no multimeter, no torque wrench. If a step below starts to feel like work that belongs to a roofer or an electrician, that is the signal to stop and hand it over.
Step-by-Step
Working through these checks in order matters, because each one can end the conversation early and save you the rest. Shading kills more rooftop solar deals than any other factor, and it is the one homeowners most often get wrong. If you are wondering how to tell if your roof is good for solar panels, the honest answer usually comes out of these five steps rather than from panel wattage.
Check the Roof’s Direction and Sun Exposure
Roof direction is measured in azimuth — the compass bearing the roof plane faces. 180 degrees is due south, 90 is east, 270 is west, 0 is north.
South-facing gets the strongest, most consistent sun in the northern hemisphere because the sun tracks across that side of the sky for the whole day. That makes it the reference point every other direction is measured against, and it is why installers across southern Spain push south and south-west pitches first.
A rough ranking, useful for a first gut check:
- South (135-225 degrees): the benchmark. Best annual production.
- South-east and south-west (90-135 and 225-270 degrees): close behind. South-east is often preferred where households use power in the morning; south-west suits evening-heavy households.
- East (45-90 degrees): works well, but output is concentrated in the morning. Fine for households with daytime usage at home.
- West (270-315 degrees): similarly viable, skewed to the afternoon. Installers usually put the west-facing penalty at roughly 10 percent against a south-facing roof of the same area and pitch, which is smaller than most homeowners expect.
- North (315-45 degrees): the weakest. Still worth it in high-irradiance regions, but the panel count has to go up to hit the same annual kWh.
To read your own roof’s azimuth: open the compass app, stand where you can see the roof clearly, and turn slowly until the on-screen direction matches the face of the roof plane you would actually use. Repeat for each plane if your roof is L-shaped or split. Then switch to satellite view and note which planes are unshaded and free of obstructions — usually one plane carries the whole project.
Do not calculate a yield figure from orientation alone. Azimuth, pitch, local irradiance and shading interact, and a number produced from one variable will mislead you.
Look for Shading Throughout the Day
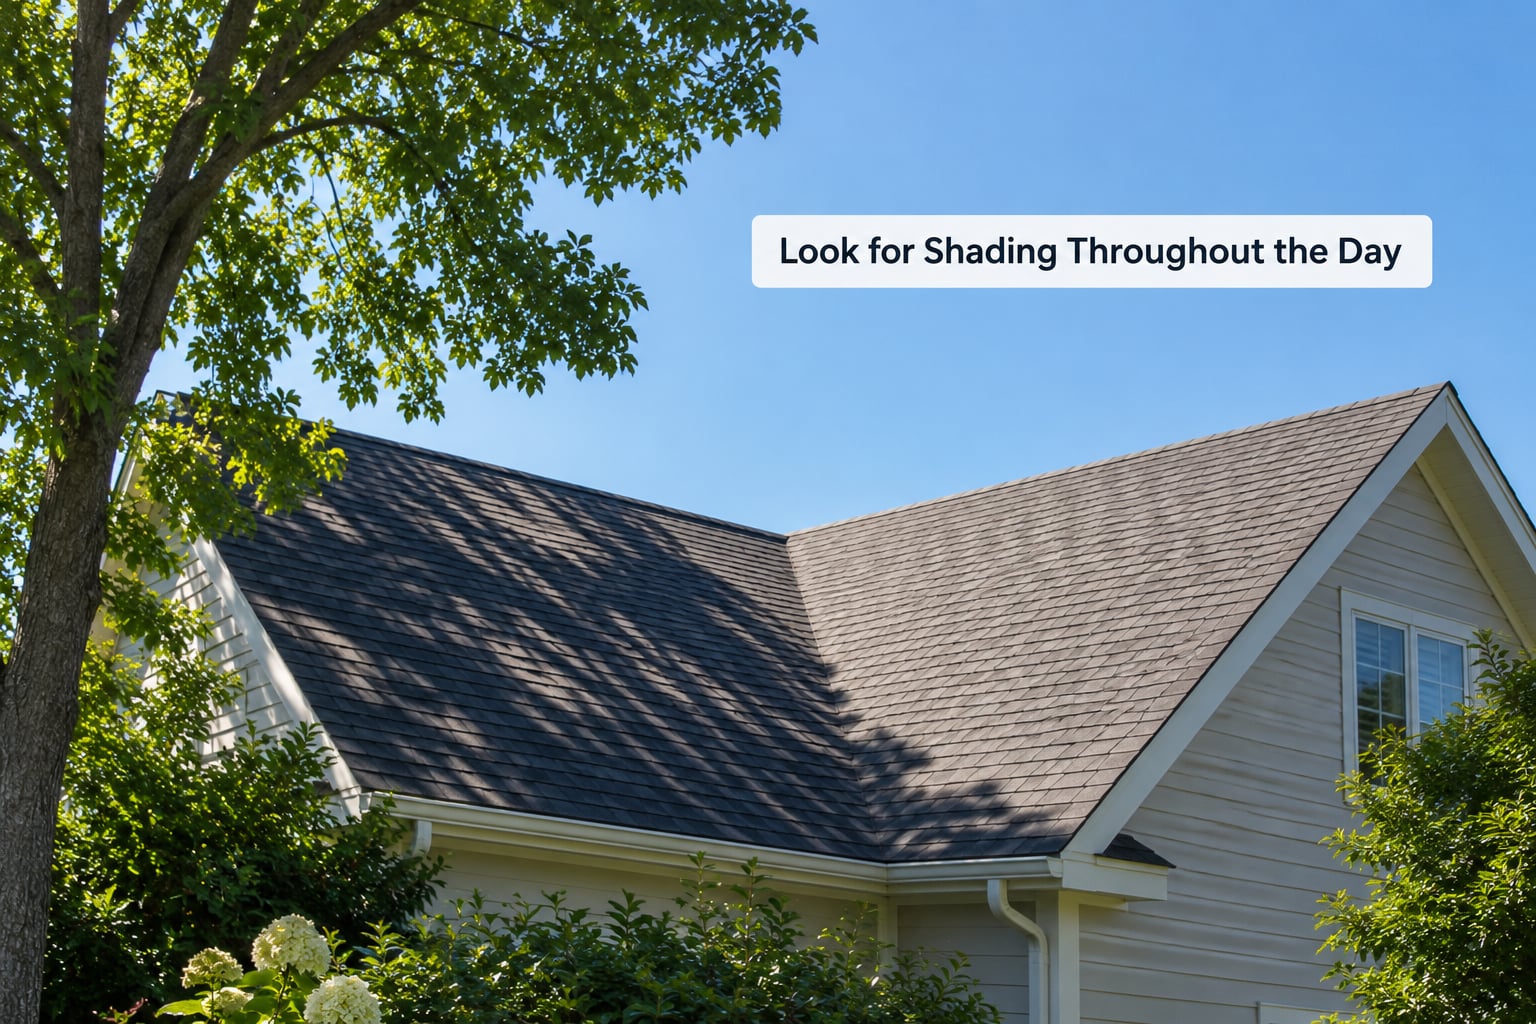
Shade is the factor that kills the most rooftop systems, and the one most often underweighted in an early estimate. Panels are rated under laboratory conditions with full, direct light; real roofs are not.
Look at your roof at least three times: mid-morning, around solar noon, and late afternoon. Watch for trees (yours and your neighbours’), taller buildings, chimneys, parapets, satellite dishes, antenna masts, rooftop HVAC units and even scaffolding on a neighbouring property.
Then watch it across seasons. A tree that clears the roof in June can cross it entirely at the winter solstice, when the sun sits lower and your system is producing least. A bare-branched deciduous tree in a photograph is not evidence of anything useful — the leafless period is exactly the low-production period.
Rule of thumb from installers and homeowners alike: if shade covers roughly a fifth of the array for a short window each morning or evening, a modern system with microinverters or DC optimisers can absorb it. If a large part of the array sits in shade through the middle of the day, the economics fall apart regardless of hardware. A whole north-east corner under a mature tree is a different problem again, because it usually cannot be designed around.
Two useful free tools exist for a second opinion. Google’s Project Sunroof analyses a specific address from satellite and street-level imagery and estimates the usable roof area and shaded portions of each plane. Google Earth’s 3D mode and its sun-position slider let you replay the sun across a specific date. Neither replaces a shade study on site, but both catch the obvious problems before an installer does.
Inspect the Roof Surface
From the ground, with binoculars, you are looking for signs that the covering is tired — not for a diagnosis.
Look for curled or missing shingles, bare patches where the granular surface has worn away, moss or algae growth in the shaded slopes, standing water in valleys, sagging sections, and flashing that looks lifted or rusted around chimneys and vents. Failures on most roofs start at the edges — flashings, ridge lines, valleys and around penetrations — so those are the areas worth looking at most closely, and the areas you want kept clear of panels.
As for material, asphalt shingles are the most common and the easiest to work with. Concrete and clay tiles are common across southern Europe and can carry panels fine, but mounting hardware is more specialised and fragile tiles can crack if walked on carelessly. Standing-seam metal is straightforward to clamp onto. Rubber membranes need ballasted or carefully flashed mounting. Wood shake is the one to rule out: brittle, heavy, fire-prone and not something most installers will penetrate.
Never walk the roof to inspect it. If you suspect damage, a roofer can assess it in an hour; you can fall through a decayed deck and learn nothing worth learning.
Estimate Usable Roof Space
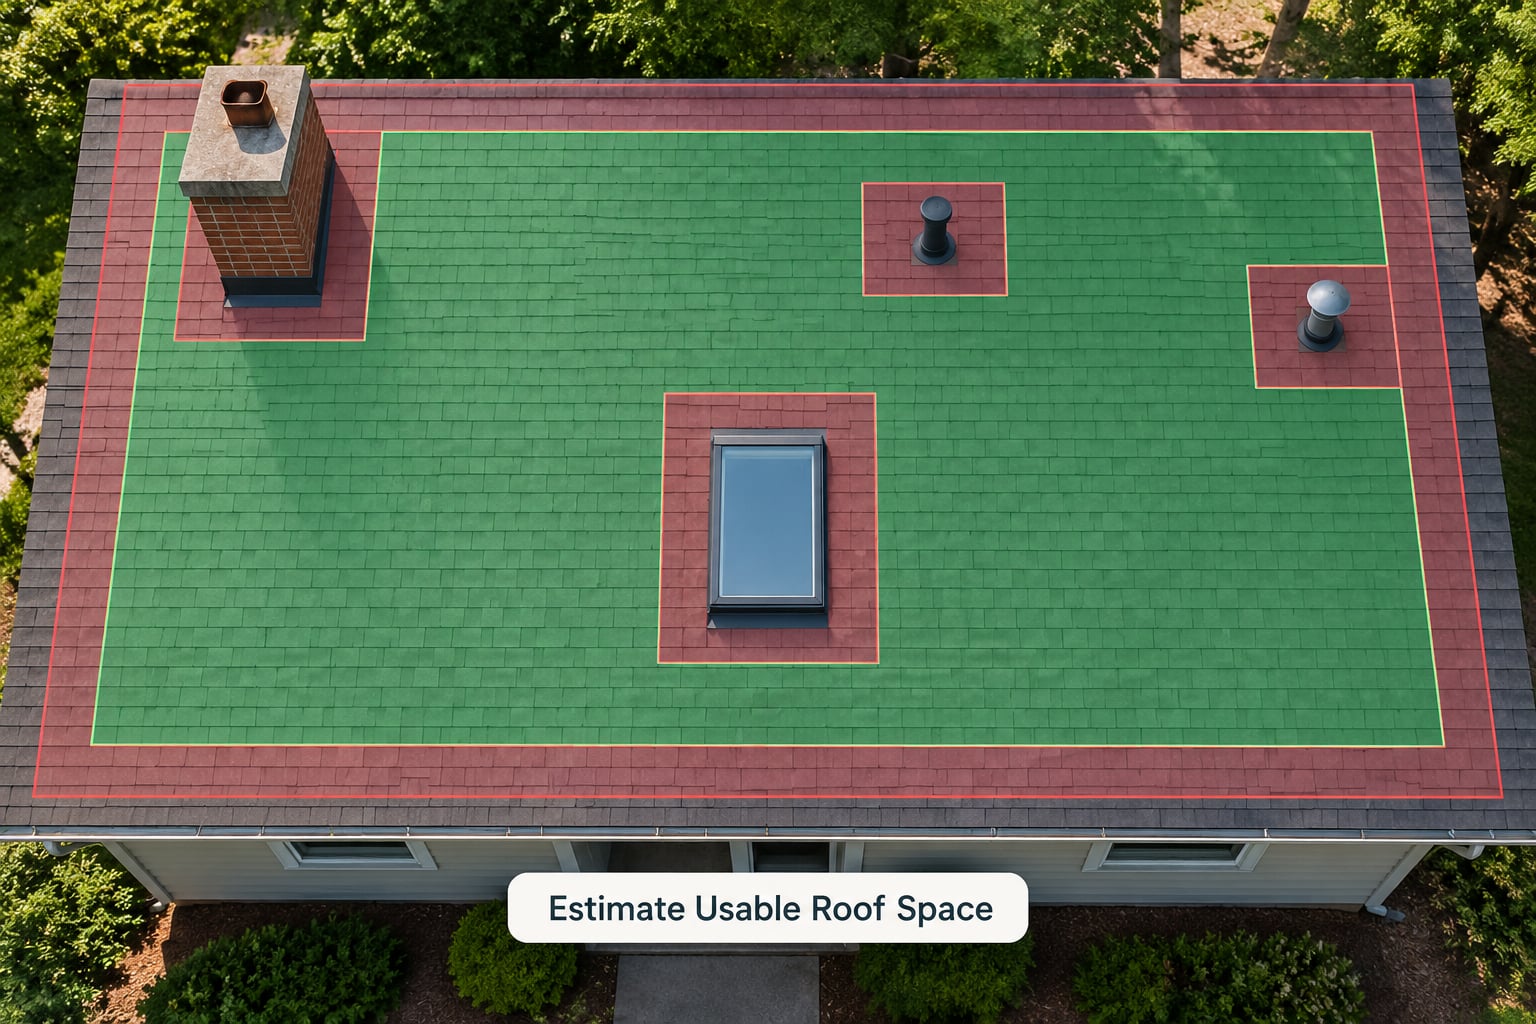
Usable roof area is the clear space left after you remove setbacks, walkway access and obstructions — not the total footprint of the house.
Start in satellite view and trace one roof plane. Measure the length along the eave and the width from eave to ridge, then multiply. Do the same for the second plane if you have one. From that number, subtract:
- Edge setbacks: many building codes require roughly 0.9 m (3 ft) of clear roof at ridges, eaves and rakes, partly for fire access and partly for the installers’ own safety lines.
- Walkway paths: access lanes around a chimney, a roof window or a hatch.
- Chimneys, vents and skylights: each one takes out not just its own footprint but a working gap around it.
- Rooftop HVAC, satellite dishes and antenna masts.
Typical modern panels are roughly 1.8 by 1.1 m and land close to 400-450 W each, so an area figure converts quickly: divide the usable square metres by about 2 to get a realistic panel count, then allow for the fact that no array ever fills a roof edge-to-edge.
Roughly 28-37 m² of clear usable space is the common range for a household-sized array, which on a single plane usually means a roof face of around 60-80 m² once setbacks and access gaps come out of it. If your number lands well below that, the rooftop option may not serve you — but this is exactly where a scaled site plan from an installer starts to earn its keep, because setbacks and obstruction shadows are hard to eyeball.
Have the Structure and Electrical System Checked
This is the one step you cannot do yourself, and the one people skip.
Panels, mounting rails and hardware add a dead load across the whole array, commonly in the range of 10 to 20 kilograms per square metre. Whether your rafters, deck and fixings can carry that depends on span, spacing, age and any past modifications: a removed wall, a converted attic, a second-storey extension. Trusses are usually straightforward; older cut-and-rafter roofs are not.
Alongside that, the electrical side needs a qualified check: the consumer unit’s spare capacity, cable runs, the inverter location, and whether the panels connect to the existing circuit or to a new export route. Permits, building consent, grid connection and utility rules all apply, and in Spain that means the installation has to be matched to the applicable autonomous-community requirements and registered properly. If you are in Andalusia in 2026, the regional bonus schemes have changed more than once, so get current figures in writing before you commit.
Older, modified or unusual roofs are exactly the case for a structural engineer rather than an installer’s own opinion. Many quotes include a light structural check; that is different from an engineer’s assessment, and you are entitled to know which one you are getting.
Common Mistakes
Judging orientation and stopping there. Azimuth tells you the peak hours, not the annual output. A south-east roof that shades badly at 4 p.m. can beat a perfectly oriented south roof with a big tree on it.
Assuming a little shade is fine. Some is manageable with the right electronics. Shade landing on the middle of the array at midday is not, and no amount of microinverter planning fixes a design that was laid out badly.
Checking trees in summer only. You will see the roof clear in June and discover the problem in January. Check the shadow at the winter solstice.
Counting roof squares instead of usable area. House footprint, roof plane area and usable panel area are three different numbers, and only the last one matters.
Planning to replace the roof later. Removing and reinstalling an array is real money and real disruption. If the covering has under about 15 years left, get it replaced first and mount on the new roof.
Installing over the roof’s weak spots. Flashings, ridges, valleys and penetrations are where roofs fail. Keep panels away from them.
Treating a sales estimate as a shade study. Installers push roof-mount regardless of conditions, and optimistic production numbers that ignore shading and roof geometry are among the most common complaints homeowners raise. Ask how the estimate accounts for shade and what the assumptions are.
Forgetting the paperwork side. Structural sign-off, permits, grid connection and warranty transferability on the roof itself all take time. Start them before the equipment is on the truck.
One safety note, plainly: this check is for the roof surface, the direction and the space. Anything involving the roof covering, the structure, the consumer unit or working at height belongs to an insured professional. If your preliminary check reveals damage, a weak deck or heavy shade, that is useful information, not a reason to attempt a fix yourself.
Frequently Asked Questions
What type of roof is not good for solar panels?
Wood shake is the clearest no: brittle, fire-prone and rarely permitted for mounting. Other problem roofs include heavily weathered or mossy asphalt shingles with under 15 years of life, fragile clay or slate tiles a crew cannot walk on safely, and low-slope or flat membranes that need ballasted or carefully flashed mounting. Roofs under heavy permanent shade from trees or buildings also fail the test in practice, whatever the covering.
Is a 20 degree roof pitch ok for solar panels?
A 20-degree pitch is workable, just not ideal. Most installers prefer roughly 30-45 degrees, matched to your latitude, because a steeper panel sits closer to the optimum sun angle and sheds rain and snow more cleanly. Below about 15 degrees you will usually need tilt racking to angle the panels correctly, which adds hardware and cost. A 20-degree pitch with south-west orientation is a workable system, not a reason to rule the roof out.
What are the 20%, 25% and 33% rules for solar panels?
These are informal rules of thumb installers use when judging a roof quickly. The 20% rule usually means roughly 20 percent of a roof face is the minimum shade a manufacturer tolerates before panel output degrades noticeably. The 25% and 33% figures commonly appear as shade or setback tolerances in older sizing guidance. Treat all three as conversation starters, not engineering: bypass diodes, microinverters and DC optimisers have made old shade limits considerably less absolute than they used to be.
Can solar panels be installed on a clay tile roof?
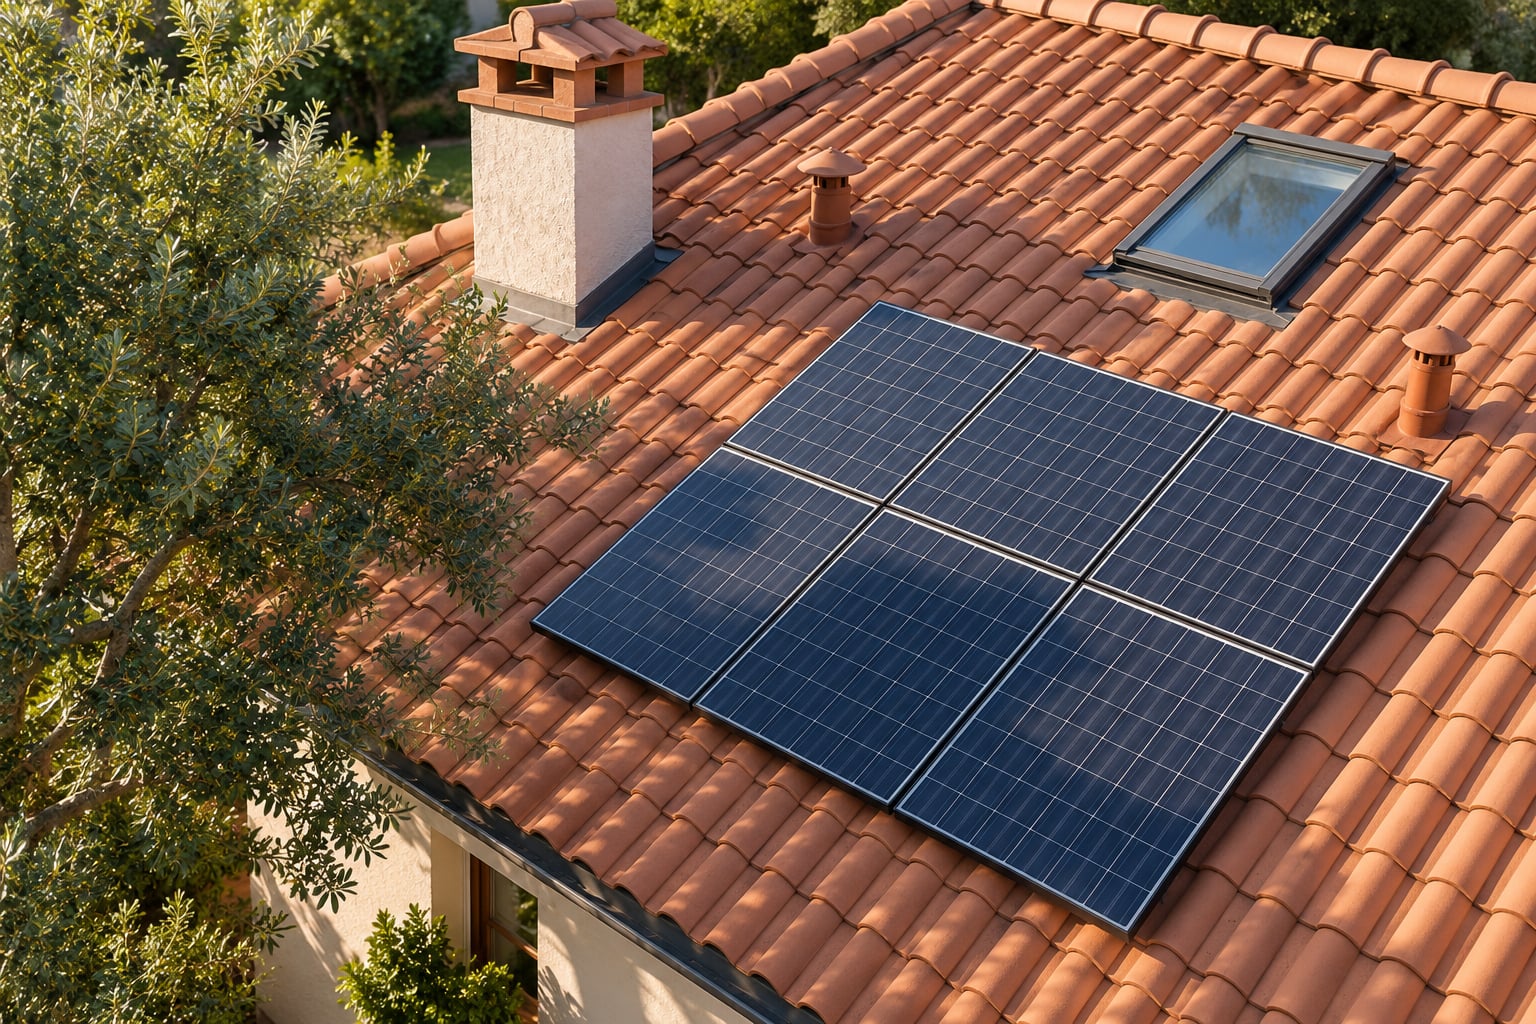
Yes, and it is routine across southern Europe. The tiles are removed at each mounting point, hooks or rails are fixed to the rafters, and the tiles are replaced around the penetration with flashing or a tile replacement piece. The catch is that terracotta and slate tiles crack if footed carelessly, so crews work from scaffolding and replace any tiles broken during installation. Have the roof checked for age and condition first: fragile tiles over a tired deck is a poor foundation for an array.
Do solar panels damage your roof?
Properly installed panels do not. Mounting hardware is designed to distribute load across the rafters and every penetration is flashed and sealed, and panels actually shelter part of the roof from sun and weather. Damage happens when a crew walks an aged or fragile roof, when penetrations are poorly sealed, or when the array is later removed for re-roofing. Tell your installer the covering type and age in advance so they plan access and flashing accordingly.
How many solar panels can I fit on my roof?
Divide your usable area by roughly 2 square metres per modern panel to get a first estimate. Usable area is one roof plane minus edge setbacks of about 0.9 m, walkway access, and gaps around chimneys, vents, skylights and HVAC units. So a 40 m² clear plane after those deductions usually yields around 18 to 20 panels, or roughly 7-9 kWp. A satellite measurement gives you a ballpark; a scaled installer layout gives you the real number.
Conclusion
Start with three things: run Project Sunroof on your address, walk the roof’s shadow at noon and in midwinter, and find out the covering type and the year it went on. Those three answers will tell you whether a rooftop system is worth pricing at all, and in 2026 they take about ten minutes.
What you cannot settle alone is the structural and electrical side, the exact usable area, and whether your paperwork will be accepted. That is the line between this checklist and a proper feasibility assessment — and it is exactly where a site survey earns its place.